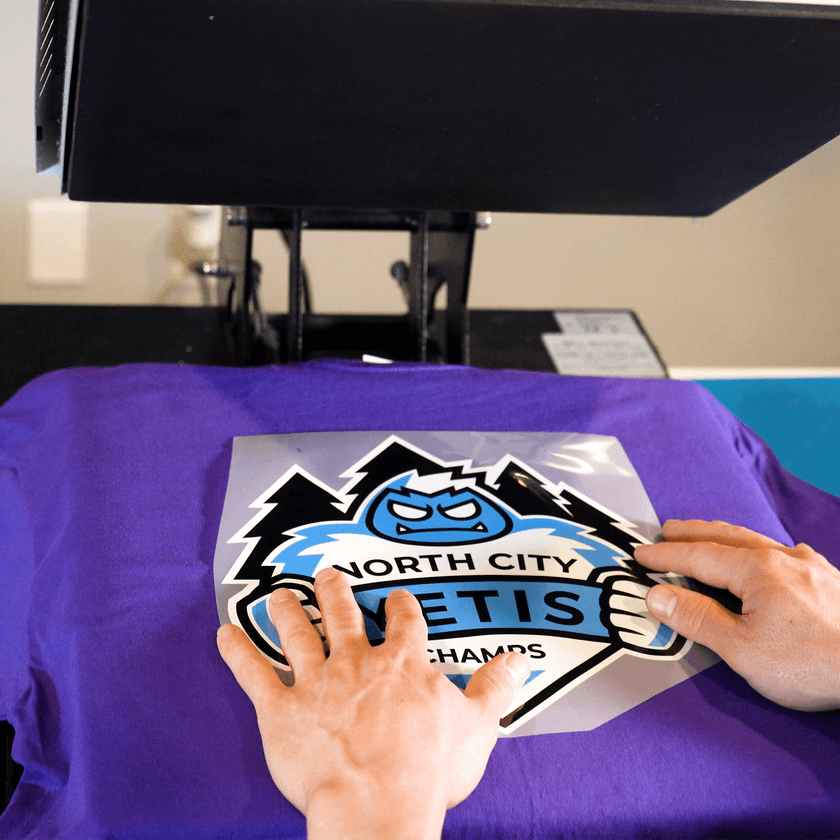
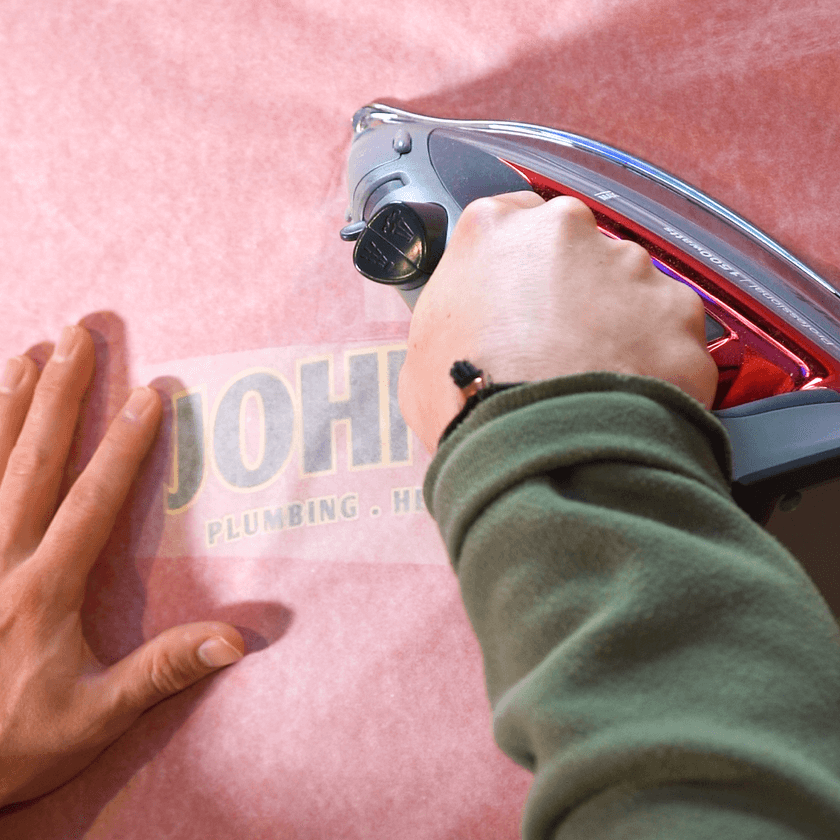
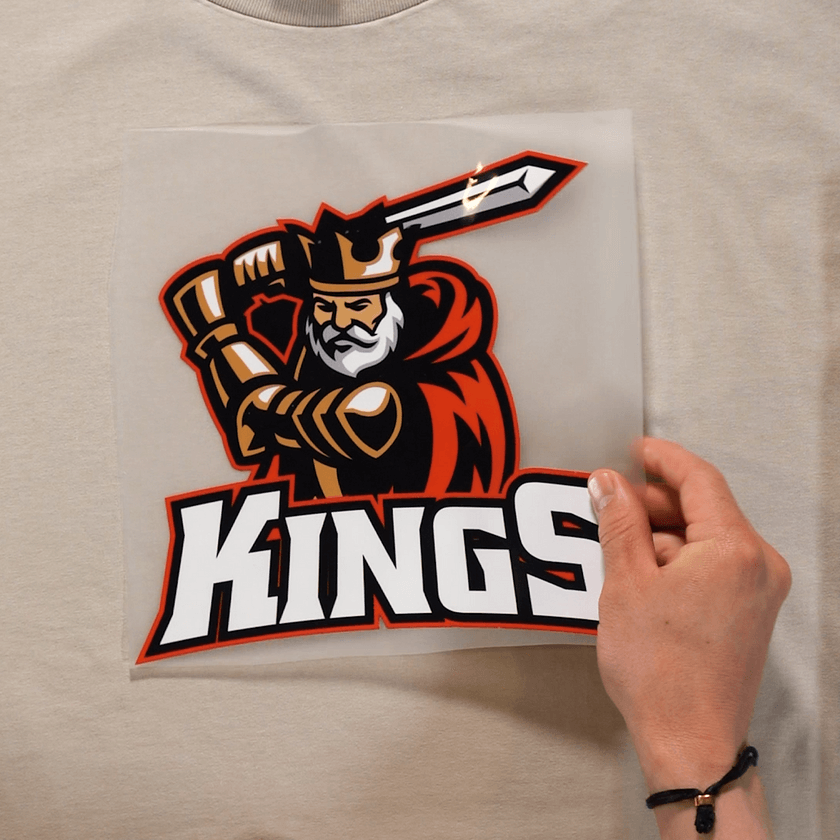
Take your time to line up your transfer in the desired location on your item. Normally, there is no need to use heat-resistant tape on flat heat presses to keep your design in place, however it is highly recommended when pressing transfers onto hats or when using an iron to keep the transfer in place. You’ll get a feel for when this is needed.
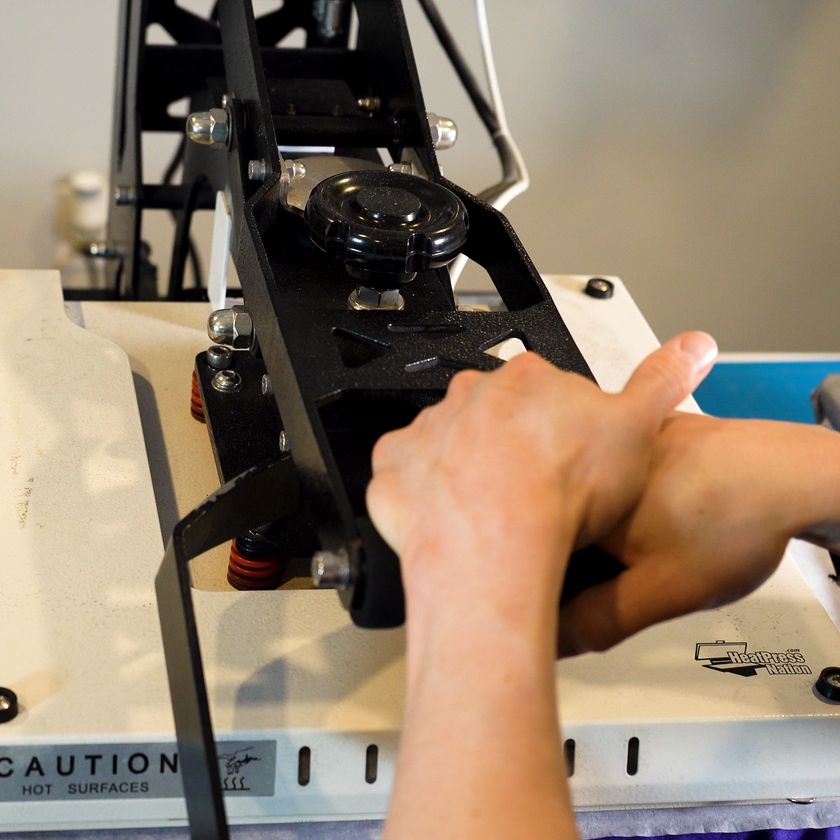
2. Press
Press your transfer with medium pressure at 310°F / 155°C for 15 seconds. You cannot damage the transfer by pressing with more heat, pressure, or time — within reason. However, too much heat can damage your garment, so test first and use parchment paper or a protective guard sheet to protect your garment from a direct iron.
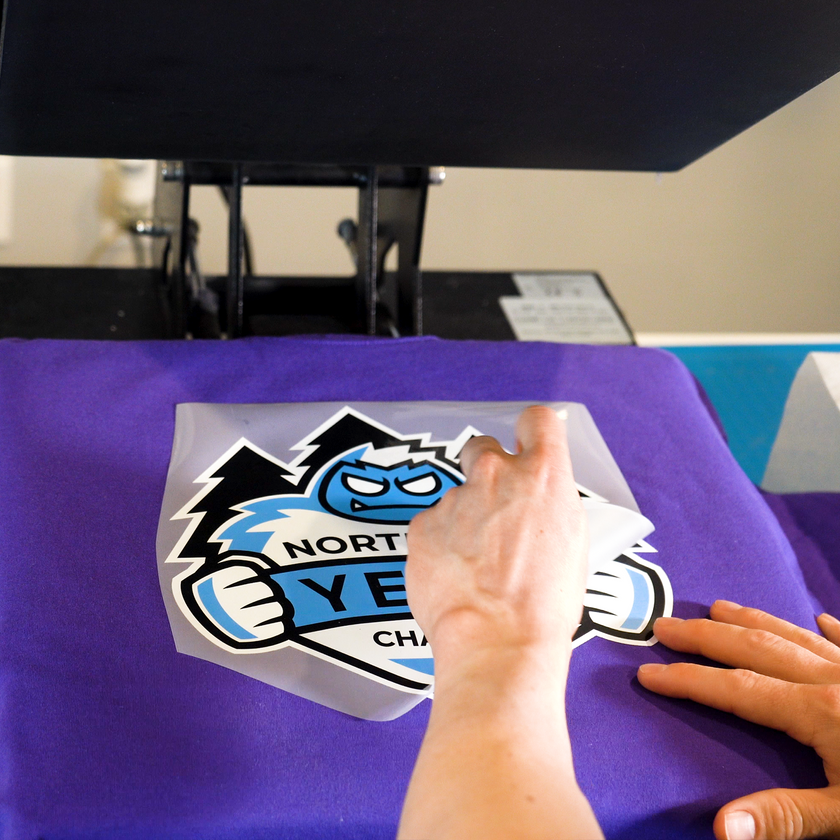
3. Let it Cool. Then Peel.
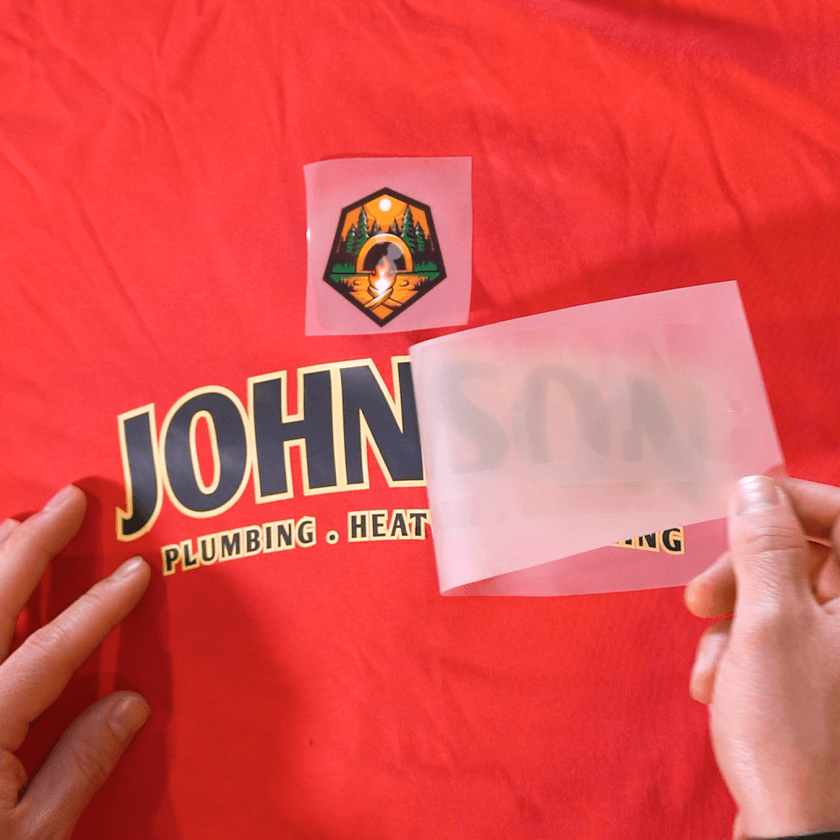
After pressing, let your transfer rest until it is cool to the touch (minimum of 15-30 seconds). Once cool, lift the transfer from one corner and gently peel back. We have a saying in the dojo, which is, don’t use your hands, use your EYES. This ensures every piece of your design is adhering to your item. If not, stop peeling, lay it back down, and trouble shoot as follows — (1.) If some or all of the design does not transfer AND it was cool when peeling, it means there was not enough heat, pressure, or time. Press your transfer again with more pressure and time first(+5-10 seconds). (2.) If that doesn’t work, try 15°F heat increments until you find the sweet spot. You truly cannot damage the transfer by pressing multiple times.
4. Final Press
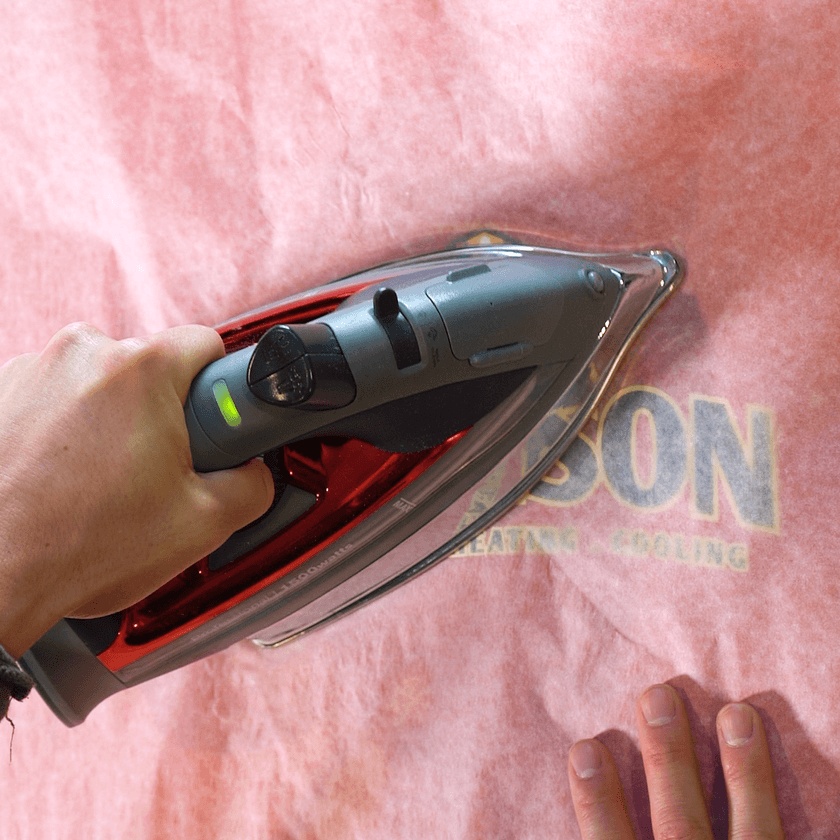
Place the parchment paper included or a single layer of t-shirt material over the design and press again for 15 seconds to soften the design, increase durability, and remove shine. If you want a shiny finish, cover with a protective guard sheet for the final press. When washing, flip shirt inside out, wash on cold and dry using low heat or hang.
Take your time and line up your artwork in the desired print area.
2. Press
Shoot for a setting on your iron that corresponds with the material you are using. If that is not hot enough where the transfer is adhering to your shirt, increase it towards cotton/linen setting which is the hotter of the settings, making sure it won’t burn your garment itself.
Before pressing, place the parchment paper or a Protective Guard Sheet over the transfer for 20 seconds, pressing down with hard pressure.
3. Let it Cool. Then Peel.
After pressing, let your transfer rest until it is cool to the touch (minimum of 15-30 seconds). Once cool, lift the transfer from one corner and gently peel back. We have a saying in the dojo, which is, don’t use your hands, use your eyes when peeling to make sure that every piece of your design is adhering to your item. If not, don’t continue peeling and press again using the guidance below. If some or all of the design is not properly transferring AND it was cool when peeling, it means there was not enough heat, pressure, or time. Lay the transfer back down with everything in place, press your transfer again with more pressure and time first(+5 seconds). If that doesn’t work, increase the heat setting until you find the sweet spot. You truly cannot OVERPRESS and damage the transfer itself.
4. Final Press
Place the parchment paper included or a single layer of t-shirt material over the design and press again for 15 seconds to soften the design, increase durability, and remove shine.
If you want a shinier finish instead, you can use our Protective Guard Sheet for this result.
5. How to Wash
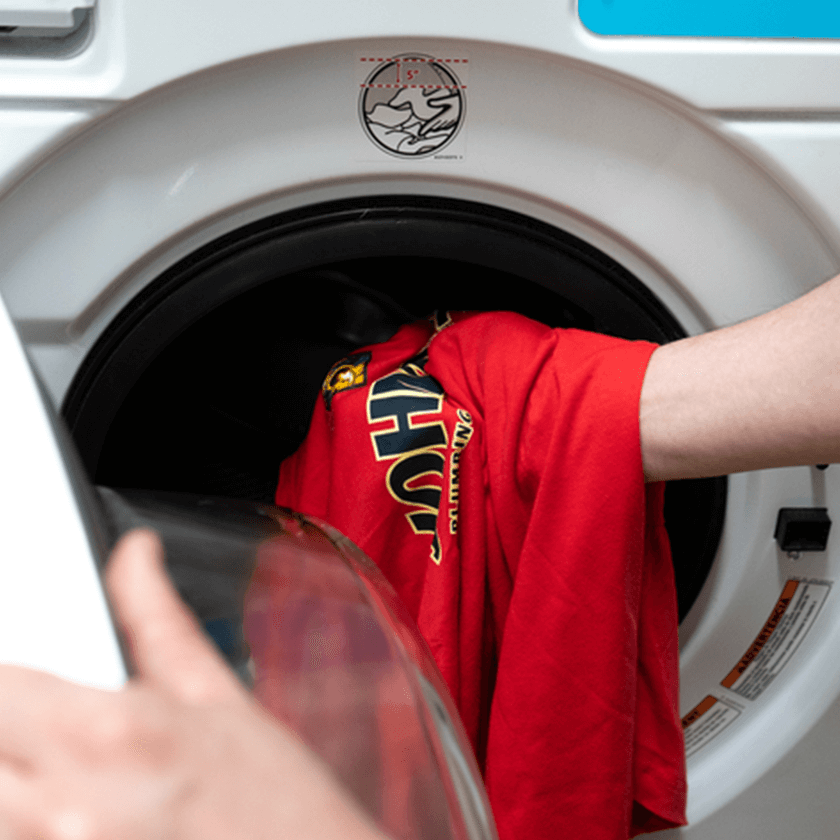
It is optimal to wash inside out with cold water. Being that you are using an iron instead of a heatpress (which applies heat with more pressure, more evenly), we would recommend hang drying instead of in the dryer. If you decide to use a dryer, we’d recommend on low heat, inside out.
Everyone’s irons, heat, pressure is different when using an iron, so test to find out what works best for you. Remember that you cannot overpress your transfers. The better they are pressed, the more durability they have through washing and drying.
There is no requirement to pre-iron your shirt, your transfer will adhere perfectly fine without doing so. Position the transfer in the desired location. Normally it is 3-4 inches down on the front of an adult t-shirts, 2-3 inches down on the front of a youth t-shirt and an inch lower on the back side of the same type of garment. The best way to figure this out is to apply a dtf transfer to one shirt and then try it on. From there, you’ll have more confidence when placing it on the rest of your products.
You can also purchase a Pressing Alignment Set for your future orders which gives you placement for various garment types like adult, youth, toddler, infant, and even 2X-6X sizes.
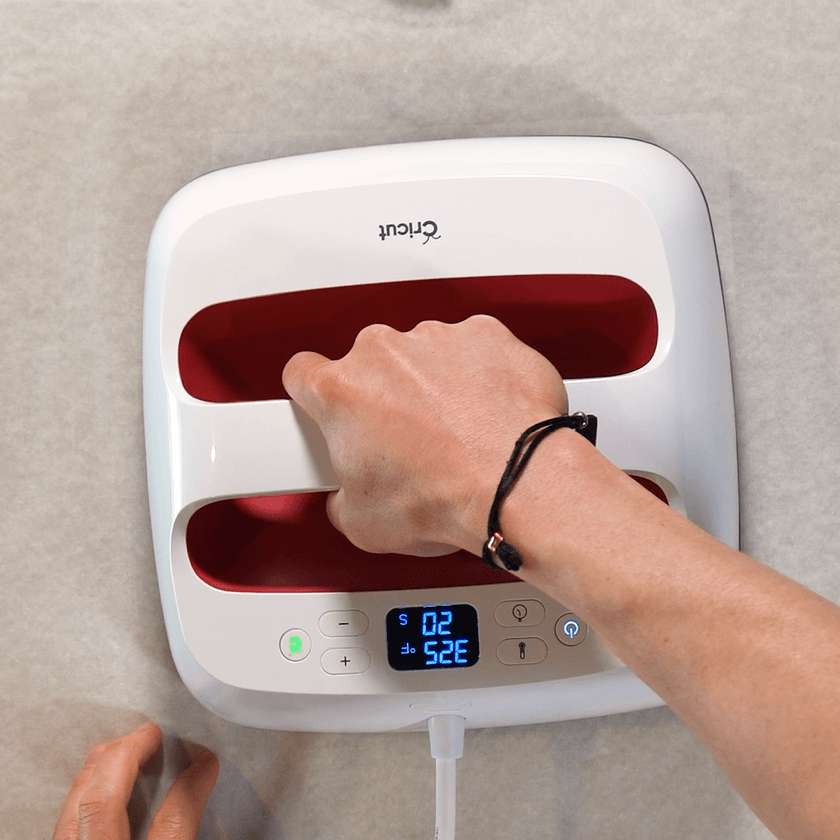
2. Press
Set your cricut to 320 degrees and 20 seconds. If that is not hot enough where the transfer is adhering to your shirt, increase it by 15 degrees at a time and try again. You can’t overpress your design, so try until you figure out the right settings.
Before pressing, place the parchment paper or a Protective Guard Sheet over the transfer for 20 seconds, pressing down with hard pressure.
Remember that you cannot overpress your transfers. The better they are pressed, the more durability they have through washing and drying.
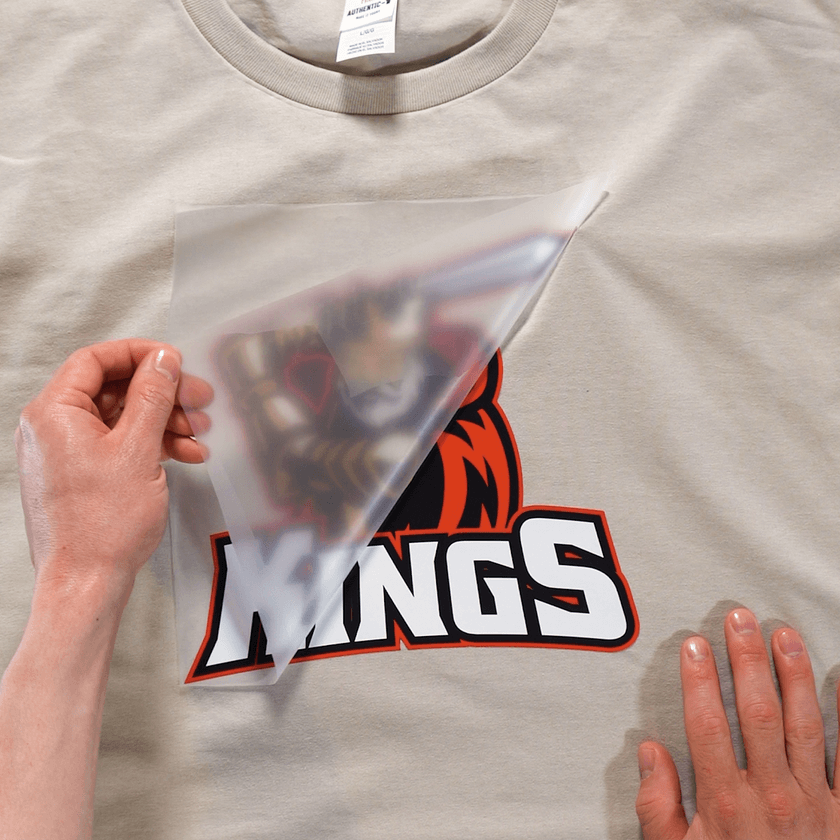
3. Let it Cool. Then Peel.
After pressing, let your transfer rest until it is cool to the touch (minimum of 15-30 seconds). Once cool, lift the transfer from one corner and gently peel back. We have a saying in the dojo, which is, don’t use your hands, use your eyes when peeling to make sure that every piece of your design is adhering to your item. If not, don’t continue peeling and press again using the guidance below. If some or all of the design is not properly transferring AND it was cool when peeling, it means there was not enough heat, pressure, or time. Lay the transfer back down with everything in place, press your transfer again with more pressure and time first(+5 seconds). If that doesn’t work, increase the heat setting until you find the sweet spot. You truly cannot OVERPRESS and damage the transfer itself.
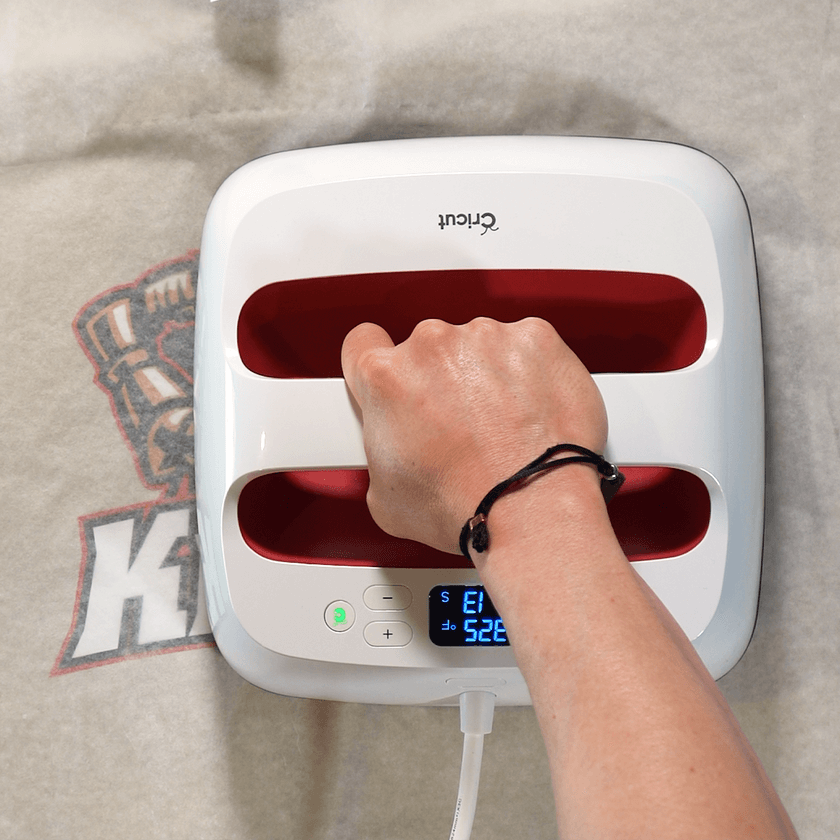
4. Final Press
Place the parchment paper included or a single layer of t-shirt material over the design and press again with the same settings for 20 seconds to soften the design, increase durability, and remove shine.
If you want a shinier finish instead, you can use our Protective Guard Sheet for this result.
5. How to Wash
It is optimal to wash inside out with cold water. Being that you are using an cricut instead of a heatpress (which applies heat with more pressure, more evenly), we would recommend hang drying instead of in the dryer. If you decide to use a dryer, we’d recommend on low heat, inside out.
Everyone’s irons, heat, pressure is different when using an iron, so test to find out what works best for you. Remember that you cannot overpress your transfers. The better they are pressed, the more durability they have through washing and drying.
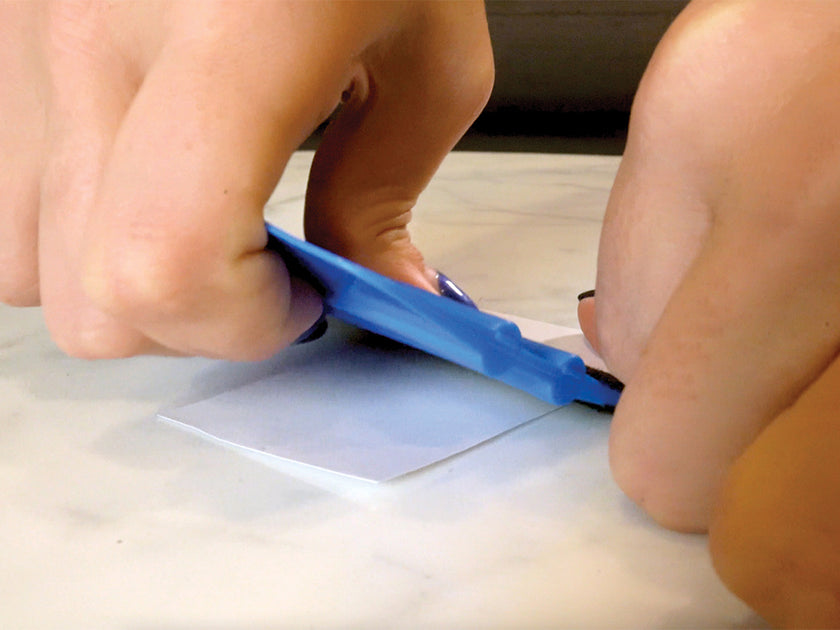
After cutting your sticker/decal out, place the design face down with the white side facing up. Using the padded end of the included squeegee, run over it with hard pressure, back and forth 3-5 times.
This forces the design onto the clear carrier sheet. The more thin and separated design elements, such as small text, the more careful you need to be.
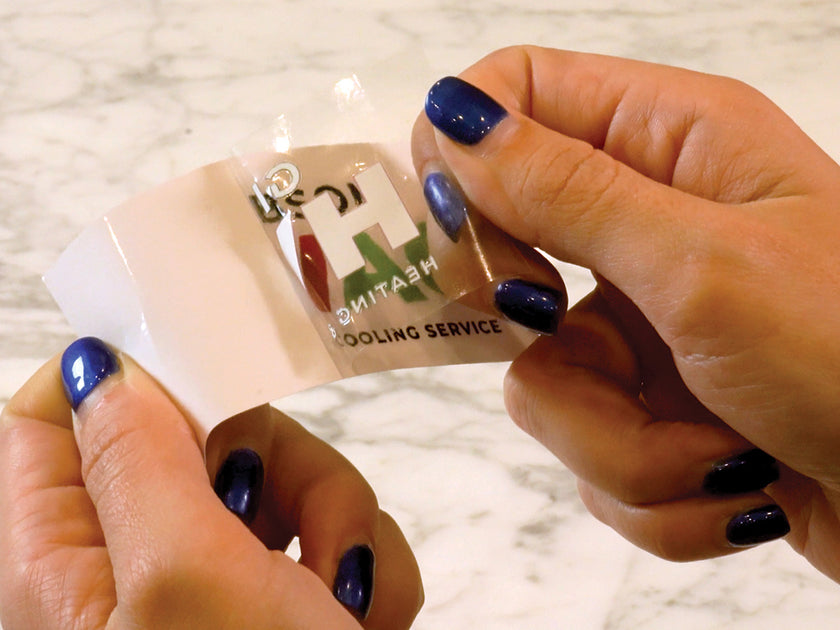
2. Separating The Clear Carrier Sheet From The White Backing
You can more easily separate the clear carrier sheet from the white backing by making a small tear. Do not tear near the design. Next, lift the clear carrier sheet up enough to grip and SLOWLY separate the clear carrier sheet from the white backing. You can start from any end of your design, as you may need to pull from different sides for a clean separation. We having a saying in the dojo – Don’t use your hands, use your EYES. This ensures every piece of your design is lifting onto the clear carrier sheet. If it’s not, set it back down, squeegee again, and try pulling that specific area which different lift from a different side.
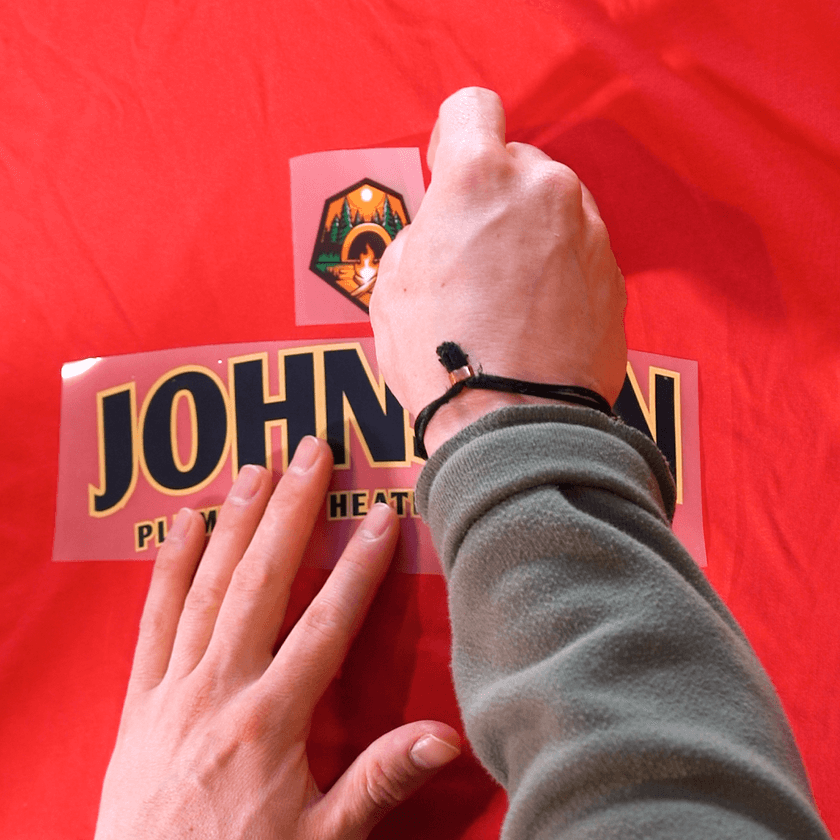
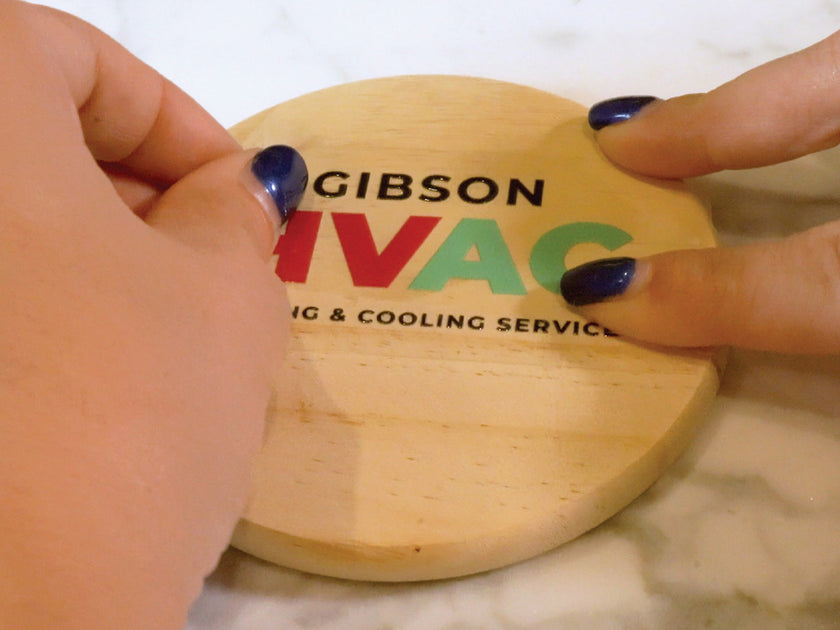
3. Placing Transfer/Design Onto Your Item
First, identify the placement area on your item. Then, carefully place the design onto the placement area starting from one side and ending at the other. This will help control your placement, reduce bubbles underneath the design, and avoid wrinkling of the carrier sheet which could cause design elements being offset and/or design overlapping.
Tip: Leave and edge of the carrier sheet lifted, aka “Dog Earred”, so you can easily grip it.
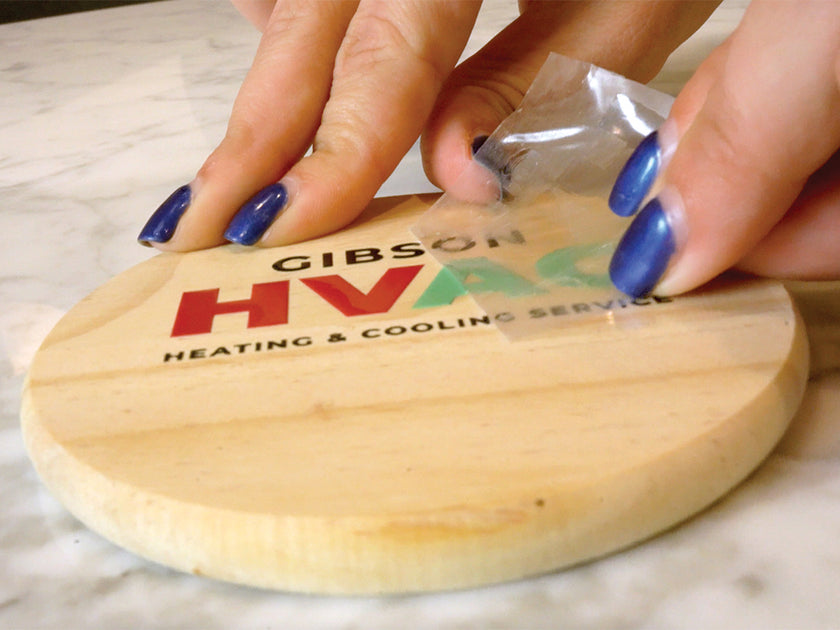
4. Completing The Transfer Process
After completing the placement onto your item, use the padded end of the squeegee to run over it within hard pressure, back and forth 3-5 times. This forces adhesion of your design to the item. Don’t squeegee over the “dog earred” edge to retain the grip.
You are now ready to slowly peel. Again, use your eyes while you peel the clear carrier sheet from one end to the other ensuring every element of your design remains on your item. While peeling, move your grip inward to maintain a controlled peel. If all elements do not transfer, you can lay the clear carrier sheet back down, squeegee hard again, and try pulling that specific area which didn’t lift from a different side.